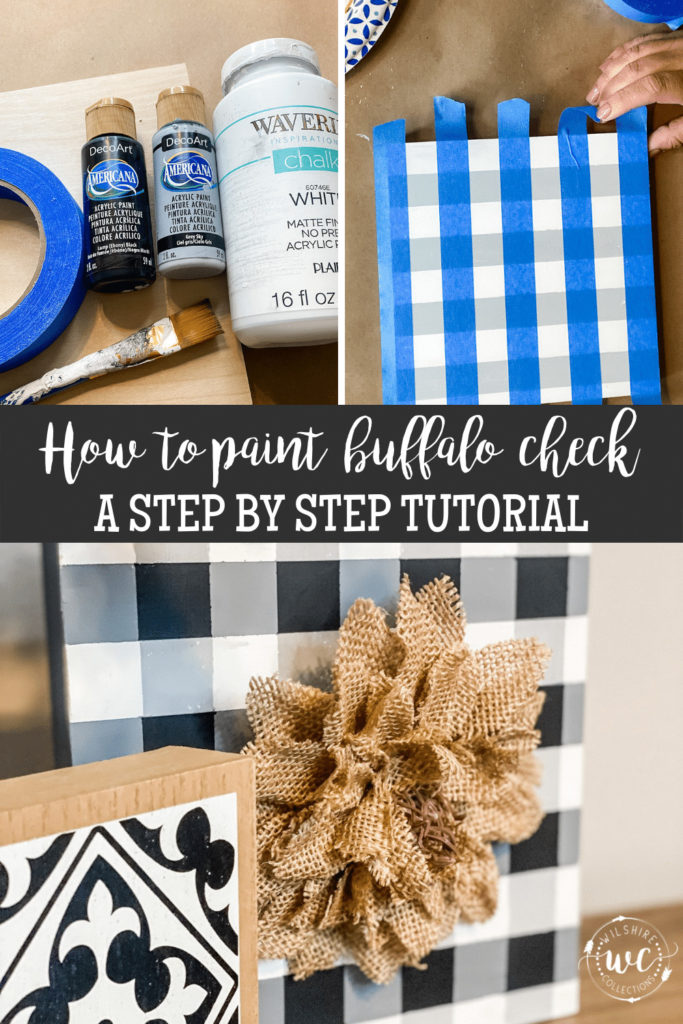
It’s true, it’s true…I’m buffalo check obsessed and have been for a while now. But I’m taking it to a whole new level now and painting it by hand too! SO FUN!!
Let me teach you how to paint buffalo check in this step by step tutorial! Once you get the hang of this, you’ll be hooked just like I am.
I will start by saying this. I have always been intimidated by this pattern when it comes to painting it. In fact, I’ve tried a couple times over the years…messed up…then gave up.
I finally decided I was DETERMINED to learn to do it in a way that made sense and worked for me. I watched a lot of tutorials online and took bits and pieces from them all to figure out what I preferred.
Once I got it, I was hooked!
What you’ll need:
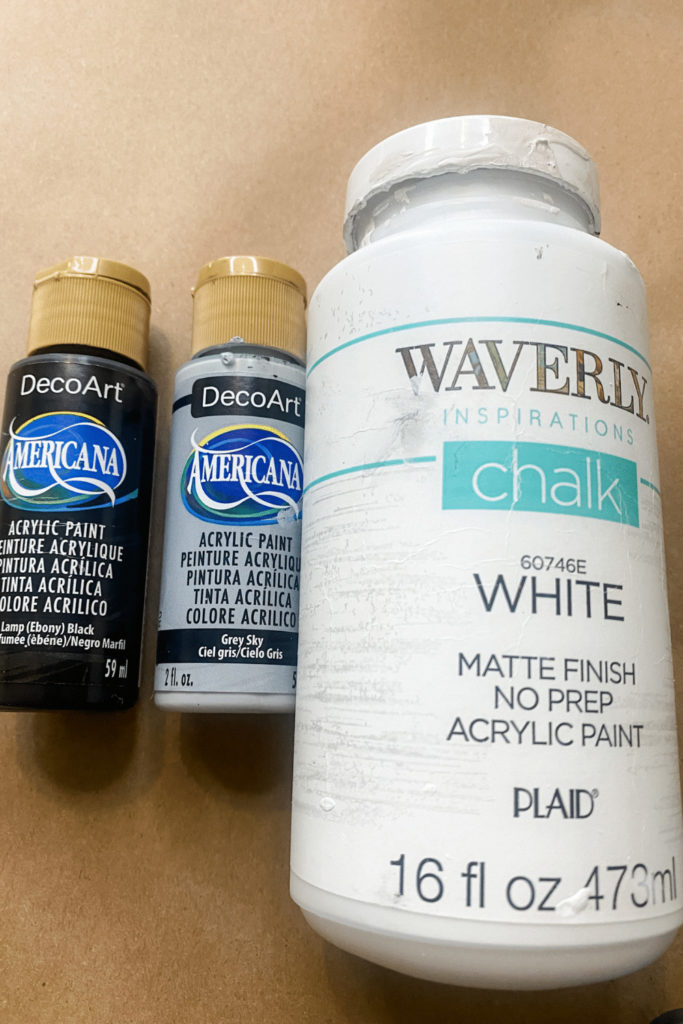
Surface to paint on (I’m using an 8×8 wood panel board)
White Chalk paint (mine is waverly from walmart)
Black and light gray paint (I’m using Deco Art Americana grey sky and lamp)
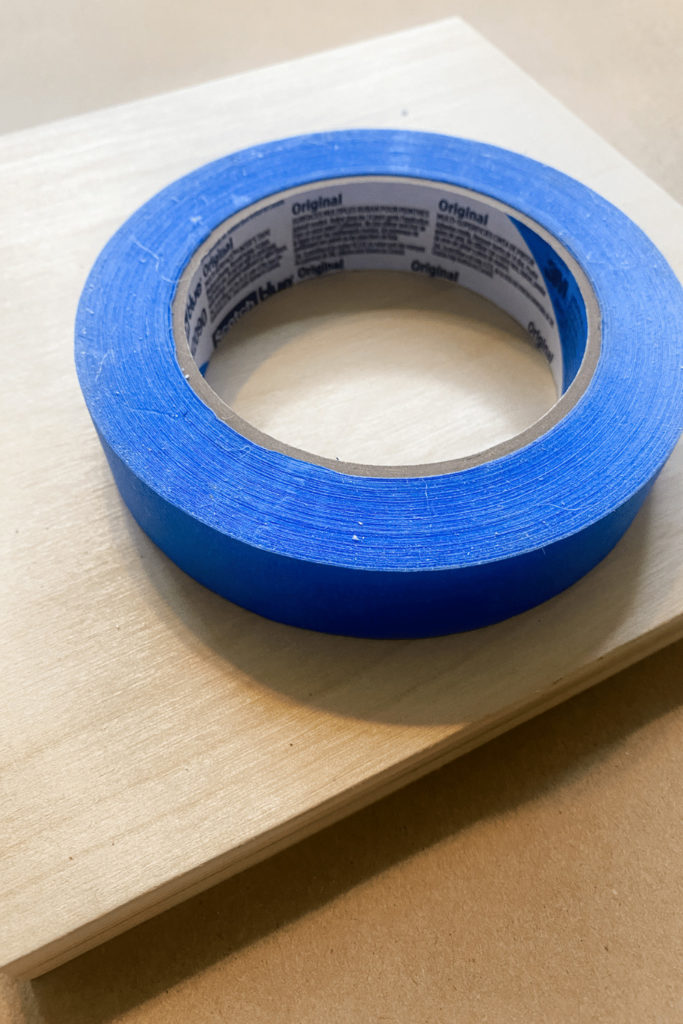
Blue painters tape (mine is one inch, but you could use different sizes depending on how big you want your check)
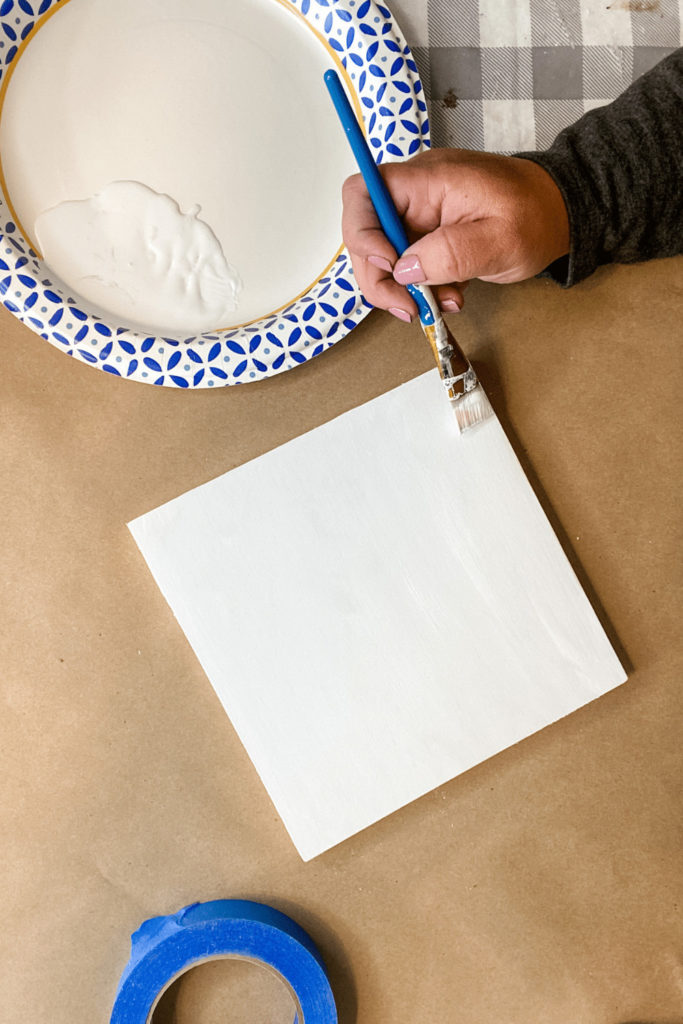
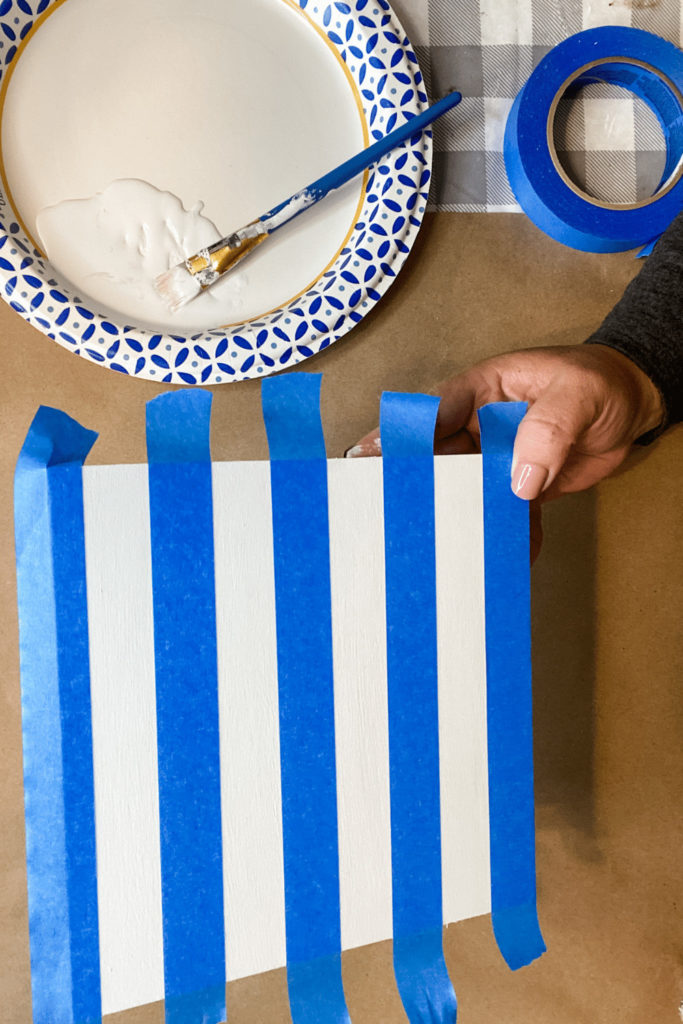
1- Paint your surface white (I did 2 coats)
2: Put your painters tape across the board starting at the bottom (put a small piece in between so you can be sure it’s spaced evenly)
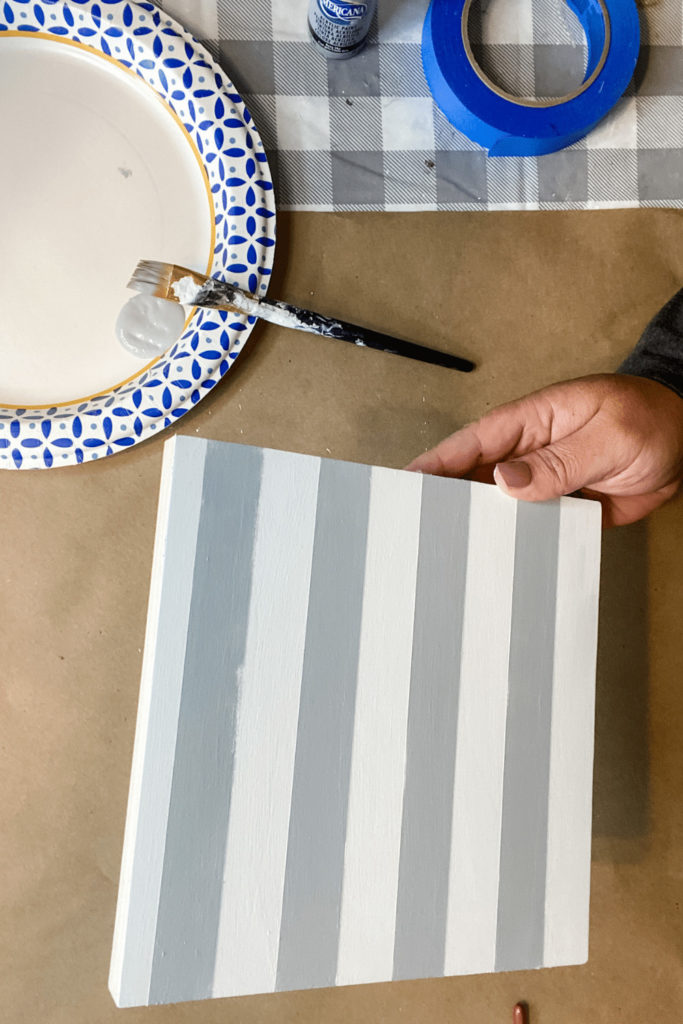
3- Paint the white parts in the light gray then pull up the painters tape to reveal the stripes. BE SURE IT IS DRY BEFORE MOVING ON TO THE NEXT STEP!
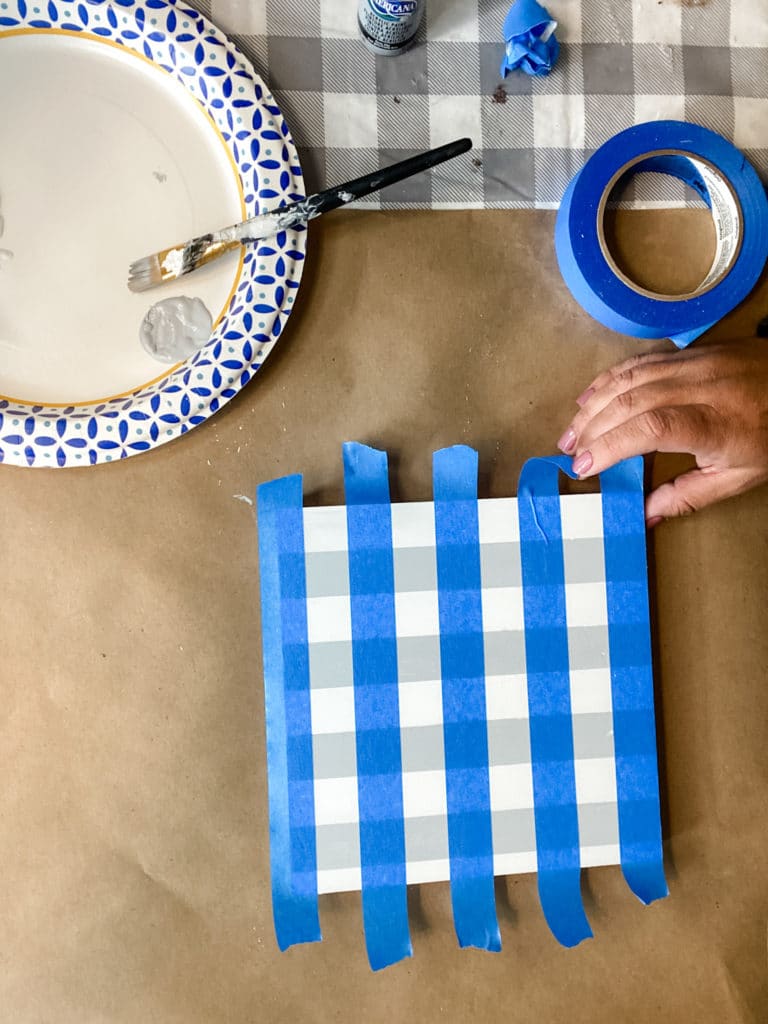
4- TURN YOUR BOARD THE OPPOSITE WAY! This is important, because we are making a plaid…therefore the tape needs to go the other direction. Repeat step two going in that opposite direction.
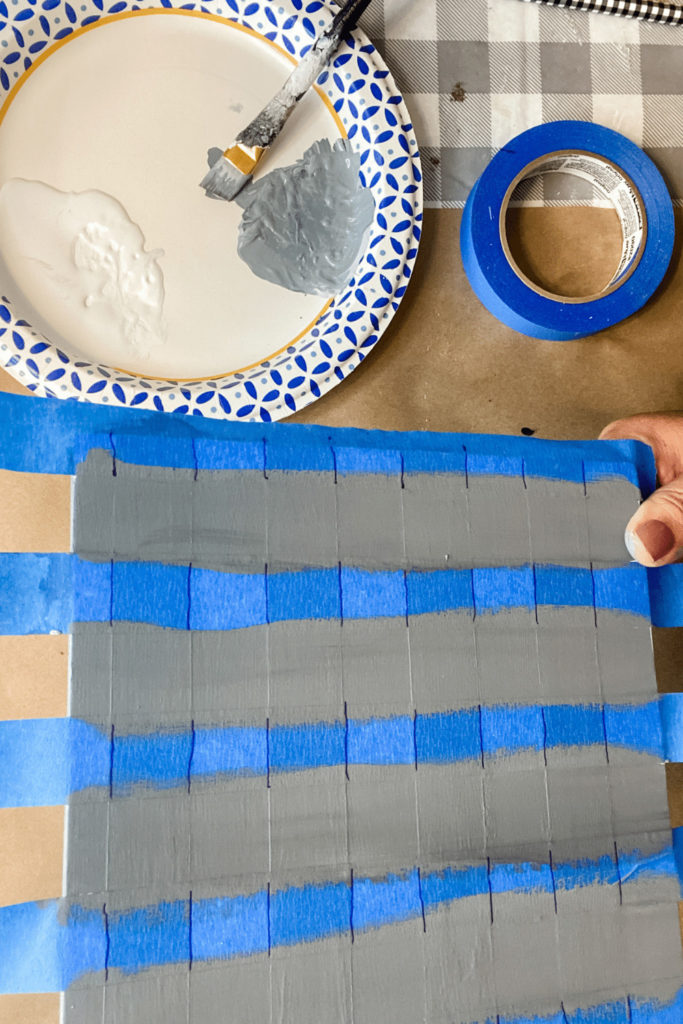
5– Add a little of the black paint to your light gray and mix to get a medium gray. Then paint it on your board. LET DRY COMPLETELY BEFORE MOVING TO NEXT STEP!
6- Flip your board back around and place more painters tape over the area where it was in Step 2. TIP- you can take a pen and mark your painters tape that’s already down so it’s easy to see where to lay that last layer.
7- Take your black paint and paint in the remaining spots. Be careful not to overload your brush with paint so it doesn’t bleed through.
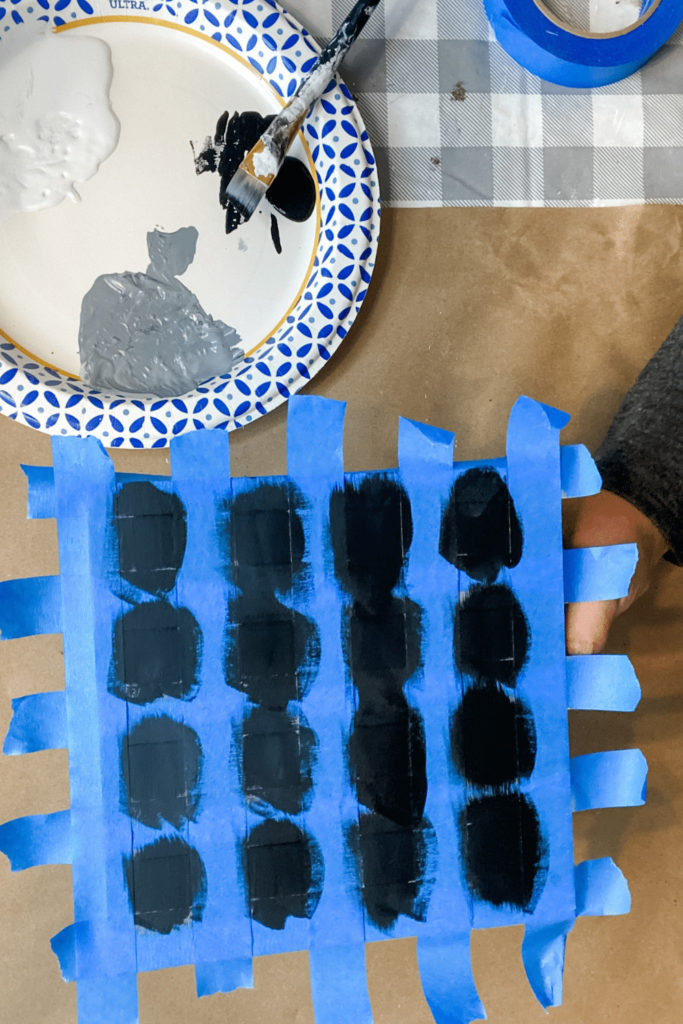
8- Peel off your paint and watch the MAGIC happen!! THE BEST AND MOST SATISFYING PART!!
That’s it! You’ve now painted an amazing buffalo check pattern! Can you believe it?!
If you are like me and also like to watch videos to really see how this is done…good news!
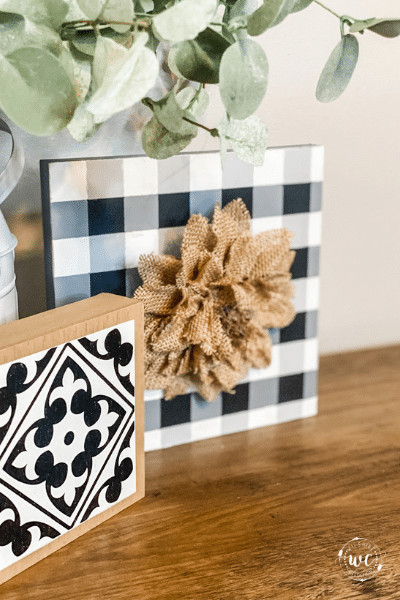
You can of course “jazz up” your piece and use it for SO many home decor DIY projects! I simply added a burlap flower here and it made the cutest little grouping with my vase and small sign.

Let me know what you think and if you think you’ll give it a try too! You could also do SO many color combos if black and white isn’t your thing. Can’t wait to try some fun ones soon!
Until next time…
Stacey
Excellent instructions !!! Thank you for posting