
Have you ever used mod podge on a project and been so frustrated because it bubbled up and just didn’t look good? ME, TOO! It’s frustrating to say the least. But..there’s an answer!
I’m going to show you how to do the mod podge iron method to avoid bubbles and I promise you, it’s going to be a game changer!
A few simple supplies are what is going to change things for you and I promise it’s super easy too!
We’ve all been there…working on a craft, things are going well and then BOOM…the mod podge bubbles creep in. Ugh. Nothing worse! Here’s the solution.
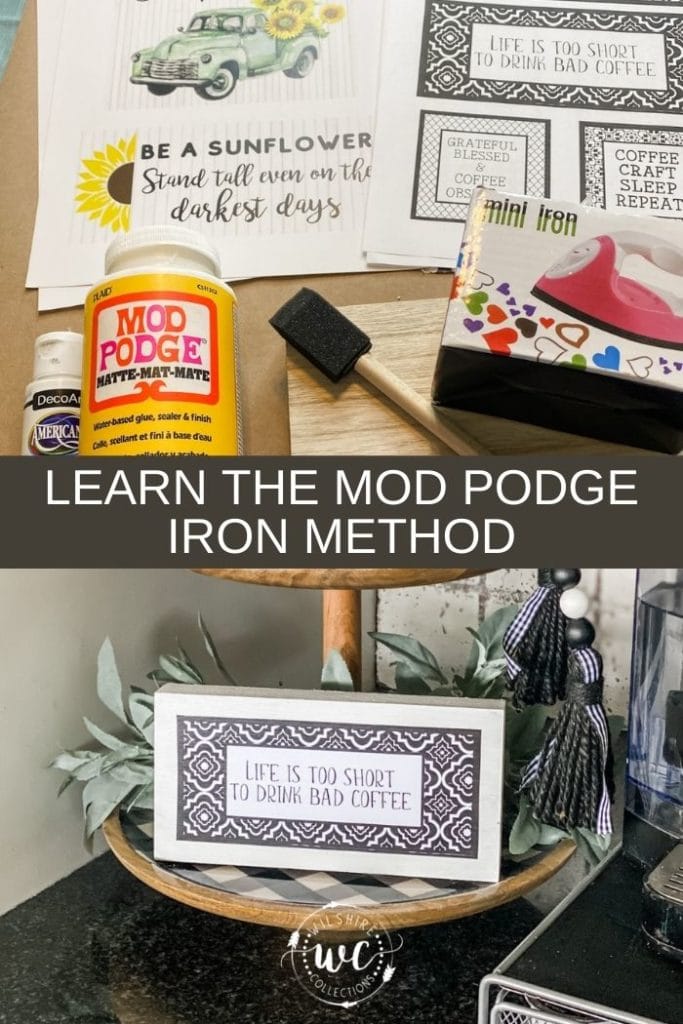
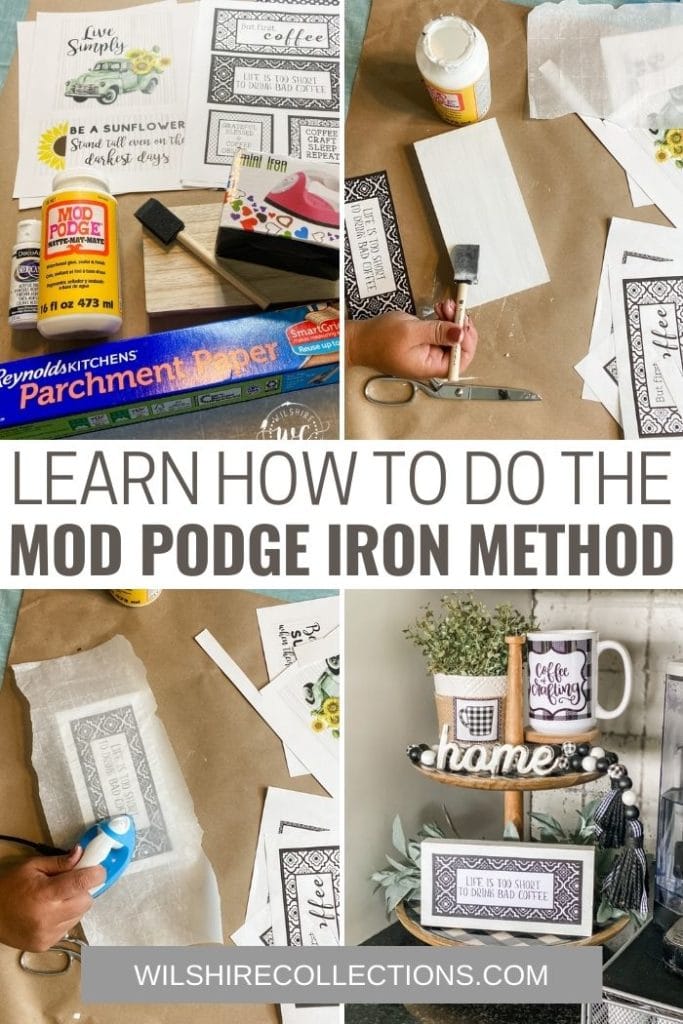
Supplies:
- Mini craft iron (Mine is from Amazon, and you can get it here). You can also use a regular iron on low heat (no steam or water)
- Parchment paper. (Yep, the kind you use in your kitchen)
- Matte Mod podge (found at any craft store)
- Whatever surface you are crafting on and whatever material you will be attaching (scrapbook paper, fabric, printable, etc)
GET THE MINI IRON HERE! IT IS LINKED UNDER CRAFT SUPPLIES!
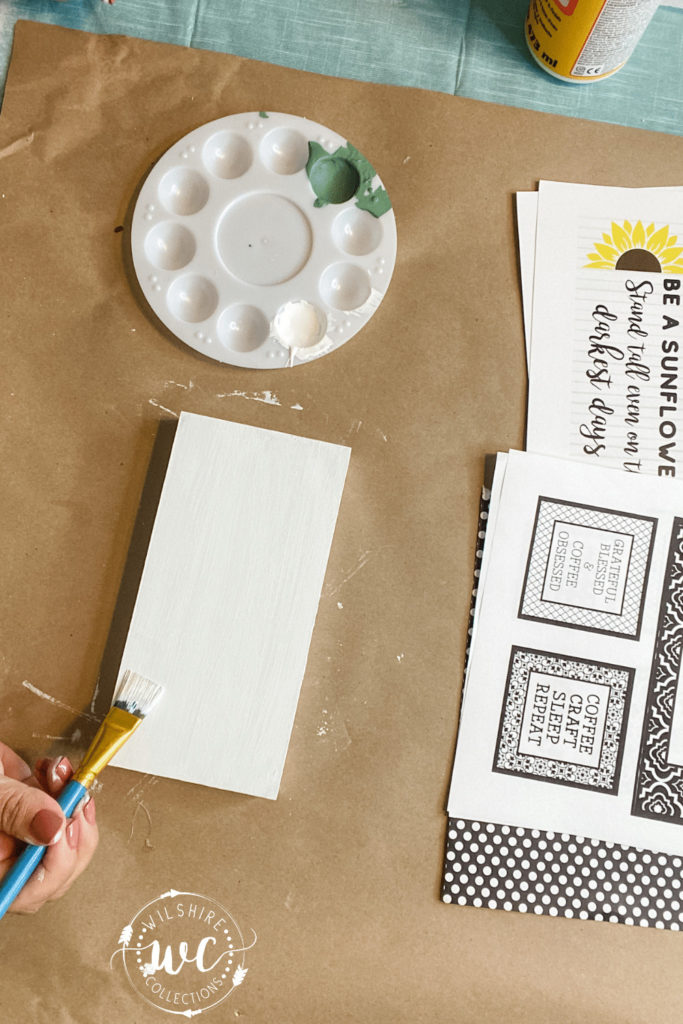
For this little reversible sign, I simply prepped my surface by painting it white and then let it dry. You can find the printable bundles that I used for this project in my store here!
When you are ready to mod podge…DO THIS!
- Apply mod podge like normal (I like to use a foam brush)
- IMPORTANT- Let it dry!! I like to say that I prefer mine to be dry-ish…not 100% dry, but pretty close. You can let it air dry, or speed it up a bit with your heat gun.
- Put your scrapbook paper (or whatever you are attaching) over the dry mod podge in the position you want.
- Lay parchment paper OVER the scrapbook paper
- Take your mini iron and go back and forth, back and forth to adhere it to your surface.
What this is doing is reactivating that glue underneath that has dried. And the result?! SUPER SMOOTH….NO BUBBLES…NO WRINKLES…PERFECT CRAFT PROJECTS!
Can you believe how smooth this is?! It truly is a game changer and I hope you will give it a try with your next mod podge project! Let me know once you do!
Until next time…
Stacey
This will work GREAT for printable crafting too! See this blog post here for more details on that!
I tried this the other day, it was smooth at first then bubbles appeared…. then what do you do?
Repeat the process! Let it dry and put your parchment paper back down and iron again!
I love this method. Do you put mod podge on top also?
yes i usually do!
Hey There, thanks so much for the tip.
FYI: if you meant to include a link for the iron, its not there. Would love to have it if possible.
Thx,
Rebecca
It works wonders. Love it.
I use the iron method
Can’t wait to give this a try! Thank you Stacey! ♥️
I haven’t try this iron method yet. I’m not sure if I should buy the iron you suggested. I’m for sure going to do it your way!!! I think you have solved my problems. Thanks for
Texting this information. JoAnn G
I bought the iron after seeing you craft with this on your live. Love it.