
Have you ever wanted to transform a space in your home but just didn’t have it in the budget? If the sticker price at the furniture stores make you run the other way, there IS a solution! PAINT WHAT YOU’VE GOT!
If y’all know me at all, you know I LOVE to paint furniture. I’ve been doing it for a little over 4 years now and you can read all about how I got started here. You would think by now that it wouldn’t surprise me every time I transform a piece, but I literally get excited with each piece I do to see how they turn out because each piece is so unique. Today I am going to share with y’all how I transformed a space in our master bedroom for under $100!

Over the past year, some of you have watched our master bedroom transform. We started with paint, which got us motivated to do more! The old matching cherry bedroom set from when we first got married (almost 15 years ago!) that was from Rooms To Go was just not quite my style anymore. We use to be big fans of buying all matching room sets 😉 It’s funny how things change over the years, and now I love to mix and match and not so much matchy match. We got rid of the bed and and got a linen headboard. I found a beautiful high boy which I intended to paint and sell, but I just couldn’t part with it. So, in our bedroom it went. I eventually got new nightstands also.
Sometimes I like to spread things out so I don’t feel so overwhelmed not only with decisions, but with the pocketbook as well. The only space that was still lacking was the wall where the old cherry dresser remained. Here is the before picture.
SIDE NOTE- This whole thing would be much prettier if that big ol’ TV wasn’t there, but since I won the fireplace battle I figure I can’t win them all. AND…since my husband supports my shopping addiction, I suppose I can support his TV addiction 🙂
So, as always with home projects I do them on impulse. I mean, I knew I was going to paint this dresser. It sat there for a good year with me knowing this, but sometimes it is hard for me to make the time for my OWN painting projects. This past Saturday we planned on just having a lazy day at home. I don’t do lazy too well, so I quickly told my husband today was the day to paint the dresser. Before I knew it, we were clearing it off and putting a drop cloth under that bad boy.
I also knew that I didn’t want to spend all day and night working on this piece, so I quickly put some short cut tricks of the trade in place. Please note, I do not do these things when painting for clients 🙂 However, when it is for me and I know I’m ok with it…I cut the corners when I can. When you’ve painted as many pieces as I have, you learn a lot along the way!
The first thing we did not want to do was empty all the drawers, or take them out for that matter. My husband actually had the idea of putting plastic bags over the clothes and it worked like a charm!  No paint splatters on anything. I also knew that I wanted to paint the hardware white, so instead of removing it which takes extra time- I just left it and painted right over it! Those few things saved me a lot of time on this project.

If you have a piece in your home that you don’t love anymore or is a little outdated…GO FOR IT!! Transform it with paint! I spent UNDER $100 to transform this piece and the results were amazing. Here is what you will need to complete a project like this from start to finish.
-
-
- A good degreaser, like this one Mean Green 132 Industrial Strength Cleaner/Degreaser, 32 fl. oz.
- A good paint brush, like this. I personally use this Zibra brand and love them. Any middle grade paint brush will do, and you probably already have one laying around your house which will save you even more money on this project! Zibra PB200LCS Grip-n-Glide 2-Inch Cut-in Paint Brush Stubby Handle
- My go to paint is Blackberry House Paint! https://www.blackberryhousepaint.com/ If you are anywhere close to a retailer for this brand, I highly recommend this paint. It goes on smooth and is easy to use. If you aren’t, there are lots of great chalk paint lines out there that would work well. For this project, I used the color Home Cooked Bread which is a beautiful shade of antique white. I used a quart, which retails for $29 and I DIDN’T even use it all! This paint goes a long way.
- You will also need sandpaper if you plan on distressing. I usually use a medium grit for sanding to create the distressing, and a fine grit for in between coats of paint. You can use the sanding sheets like these 3M 9002NA-20-CC Sandpaper Aluminum Oxide, 9-Inch by 11-Inch, Medium
or the sanding blocks like these 3M Sanding Sponge, Medium Grit, 6-Pack
. I honestly feel this is personal preference. I like to use the blocks for the fine grit in between coats of paint. This will make your piece so smooth when done and is a great step to include. For distressing, 9 times out of 10 I use the sheets and tear them into smaller pieces.
- Waxing Rags . You can buy these already cut up t-shirt cloth rags like these Buffalo Industries (10521) White Recycled T-Shirt Cloth Rags – 1 lb. bag
You can also cut up your own t-shirts to save even more $$$!
- Wax! A natural wax will act as your sealant once you are done painting your piece. I used the Blackberry House natural wax for this piece, which retails for $15. A little goes a LONG way with this, so you will have plenty leftover for future projects.
- A good degreaser, like this one Mean Green 132 Industrial Strength Cleaner/Degreaser, 32 fl. oz.
-
That’s it! That is all you need to transform a space. That entire list will cost you under $100, and you will have supplies LEFT OVER!! I am a retailer for Blackberry House paint and waxes, so if you are local you can pick up everything listed above at Priss and Pearls in Spring Hill. It can be your one stop shop for all of your painting needs!
Here are some pictures during the process of painting my dresser. It was such a dark cherry colored wood, and since I was painting it white it did take 3 coats on this piece. However, many colors and pieces only take 2 coats. It was a good one day project and by late afternoon we carefully placed the décor in its place and I was snapping pictures. Here are some pictures during the process!
-
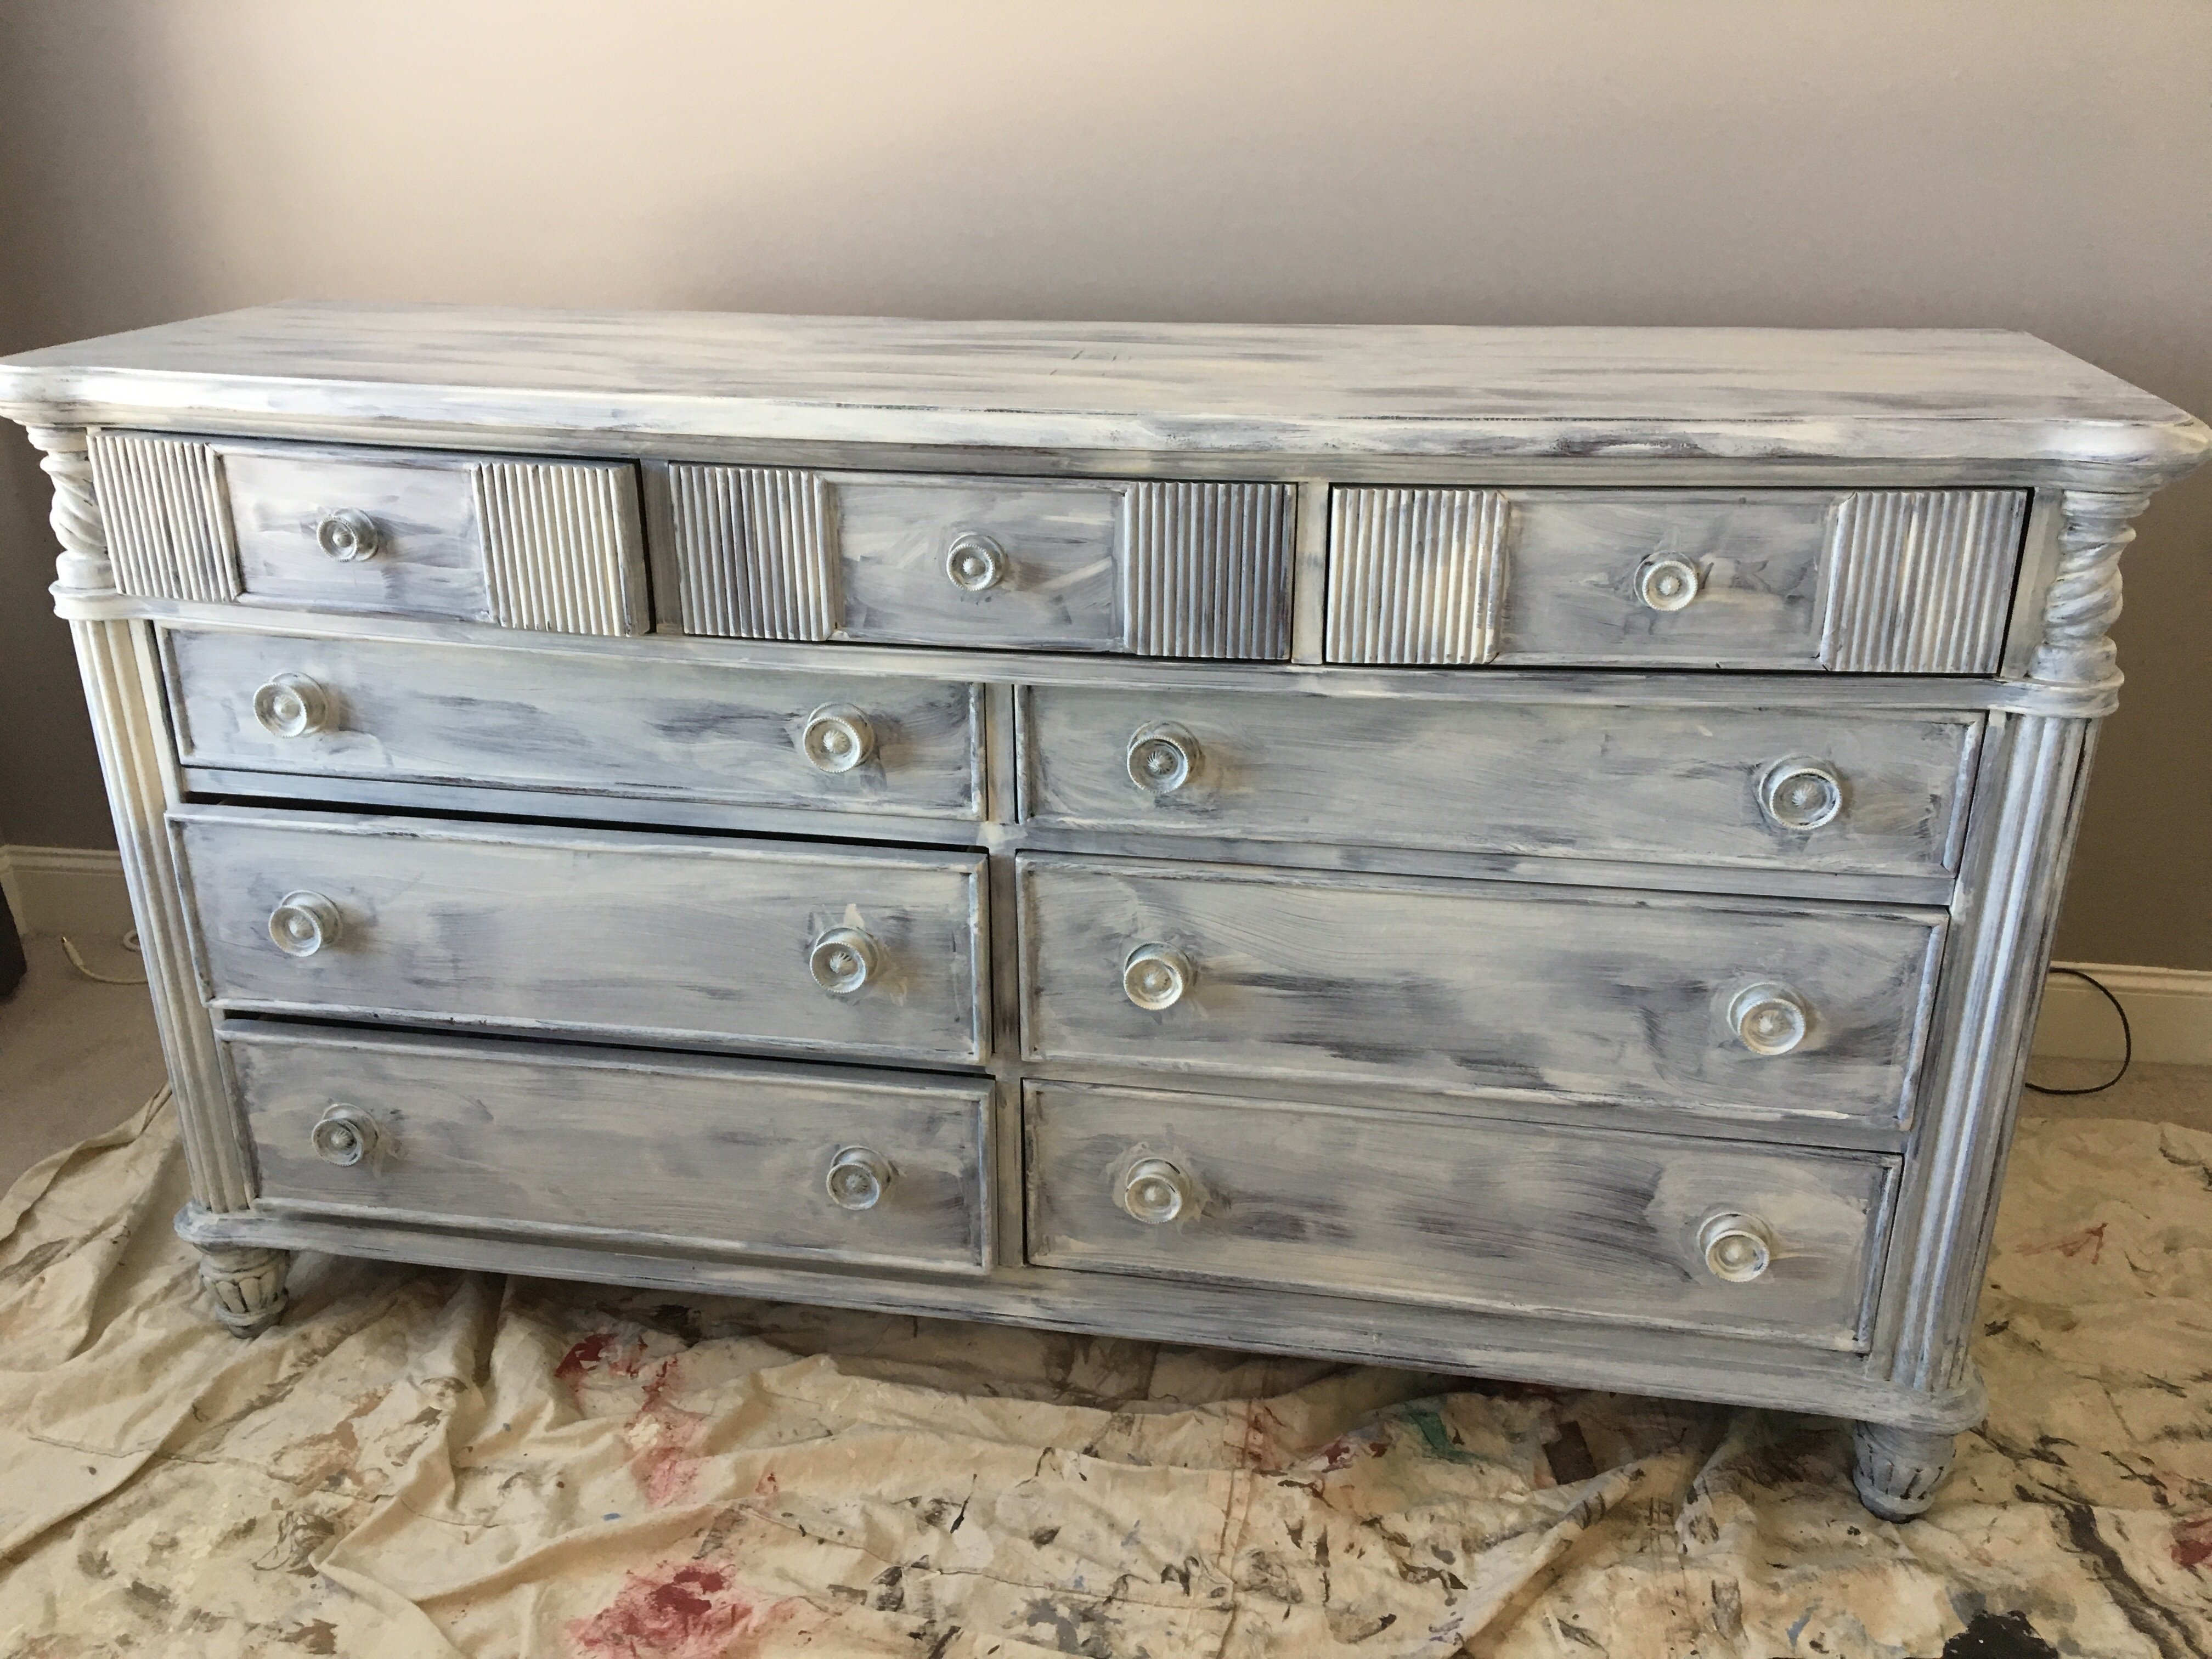
- One coat of paint
-
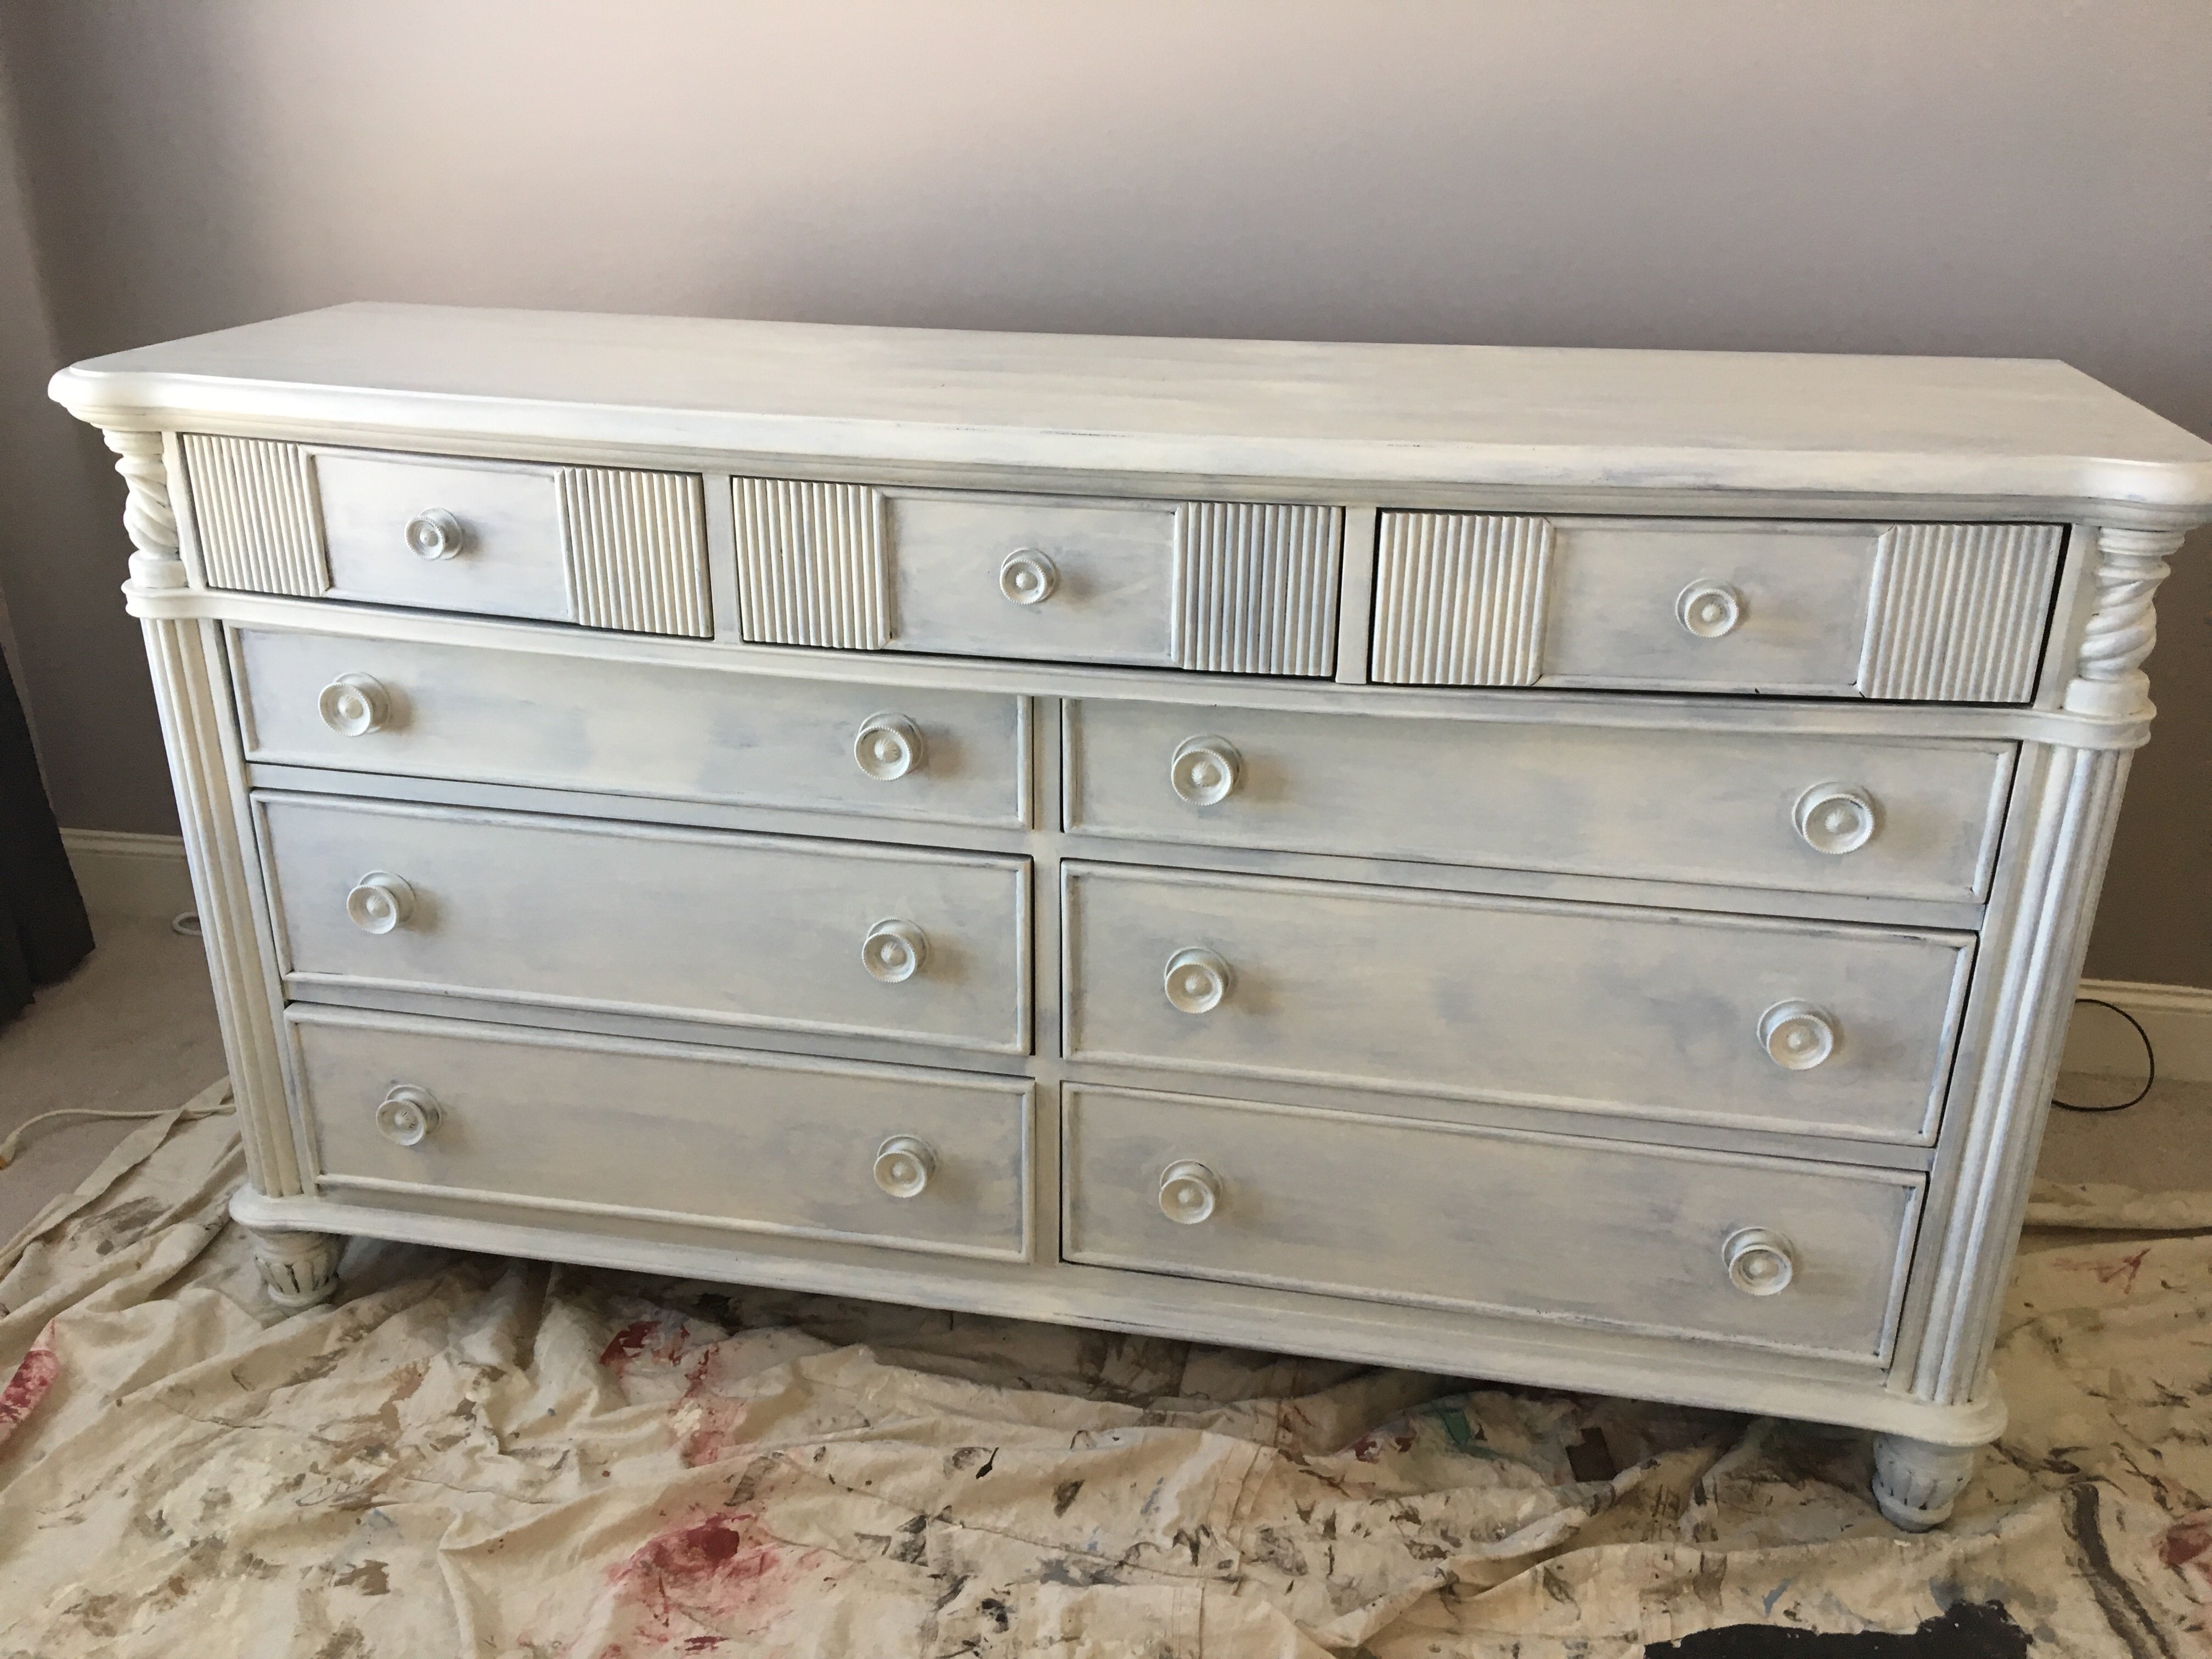
- 2 coats of paint
-
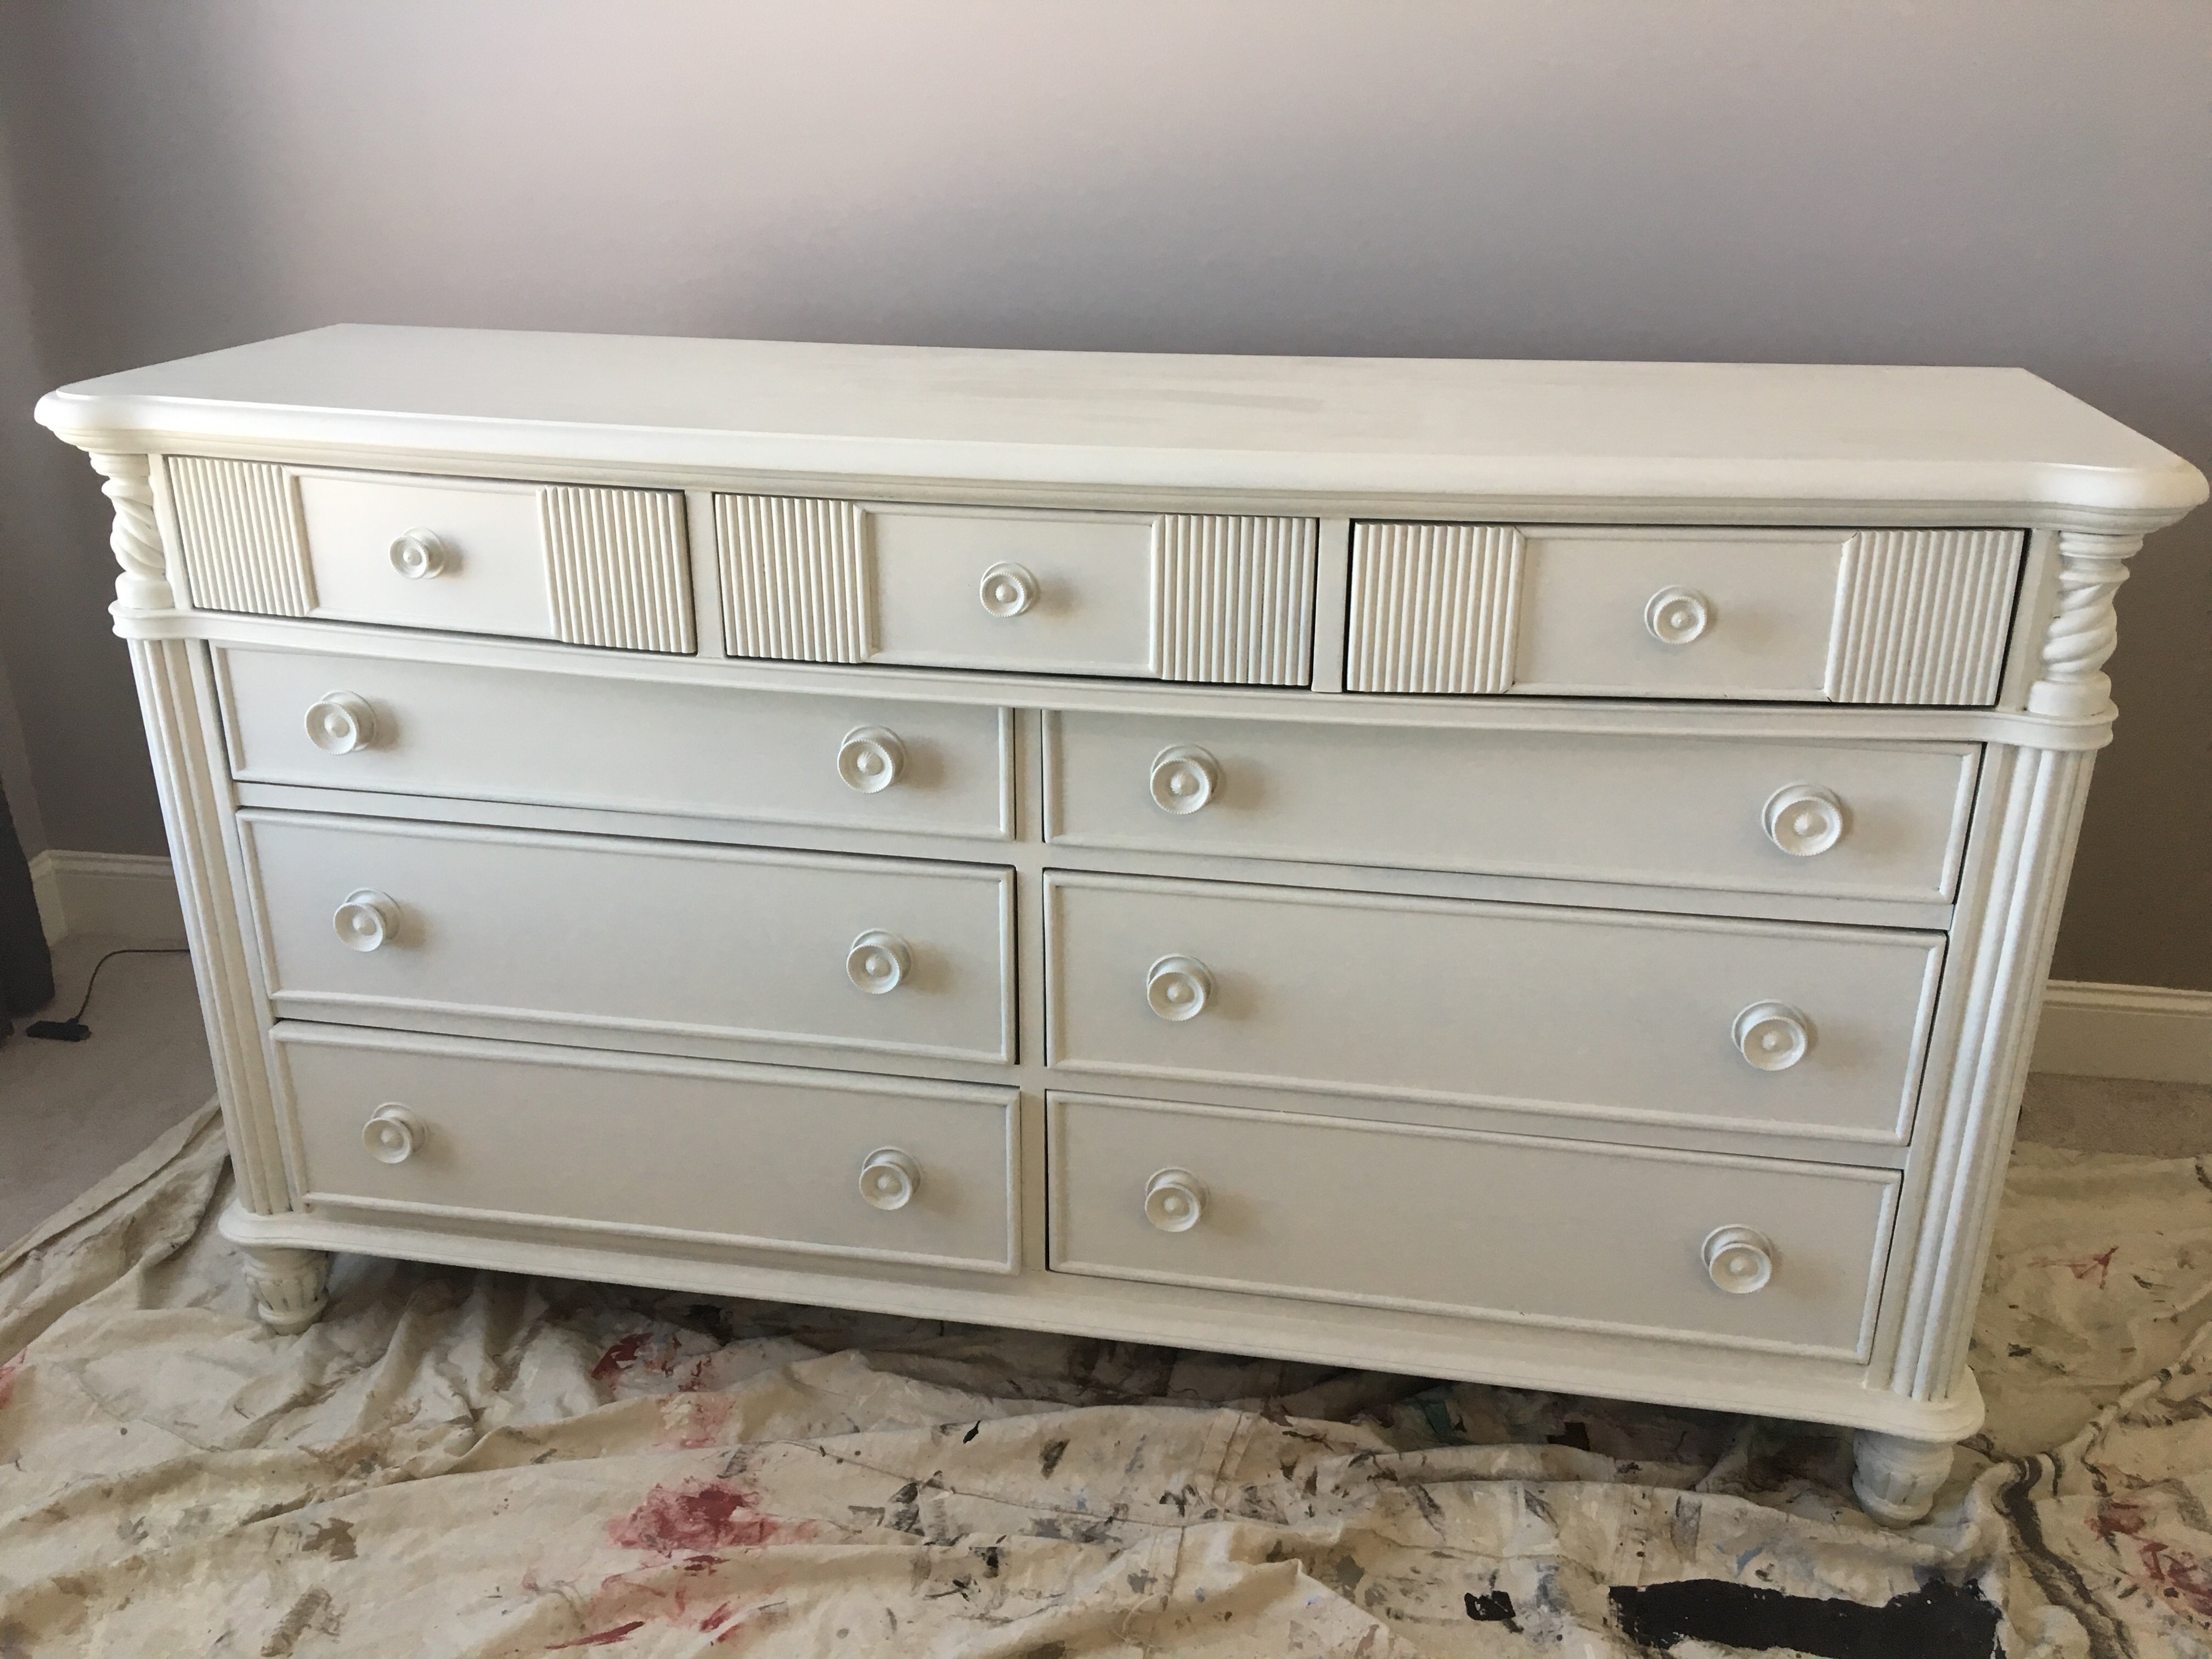
- 3rd coat of paint before distressing
-
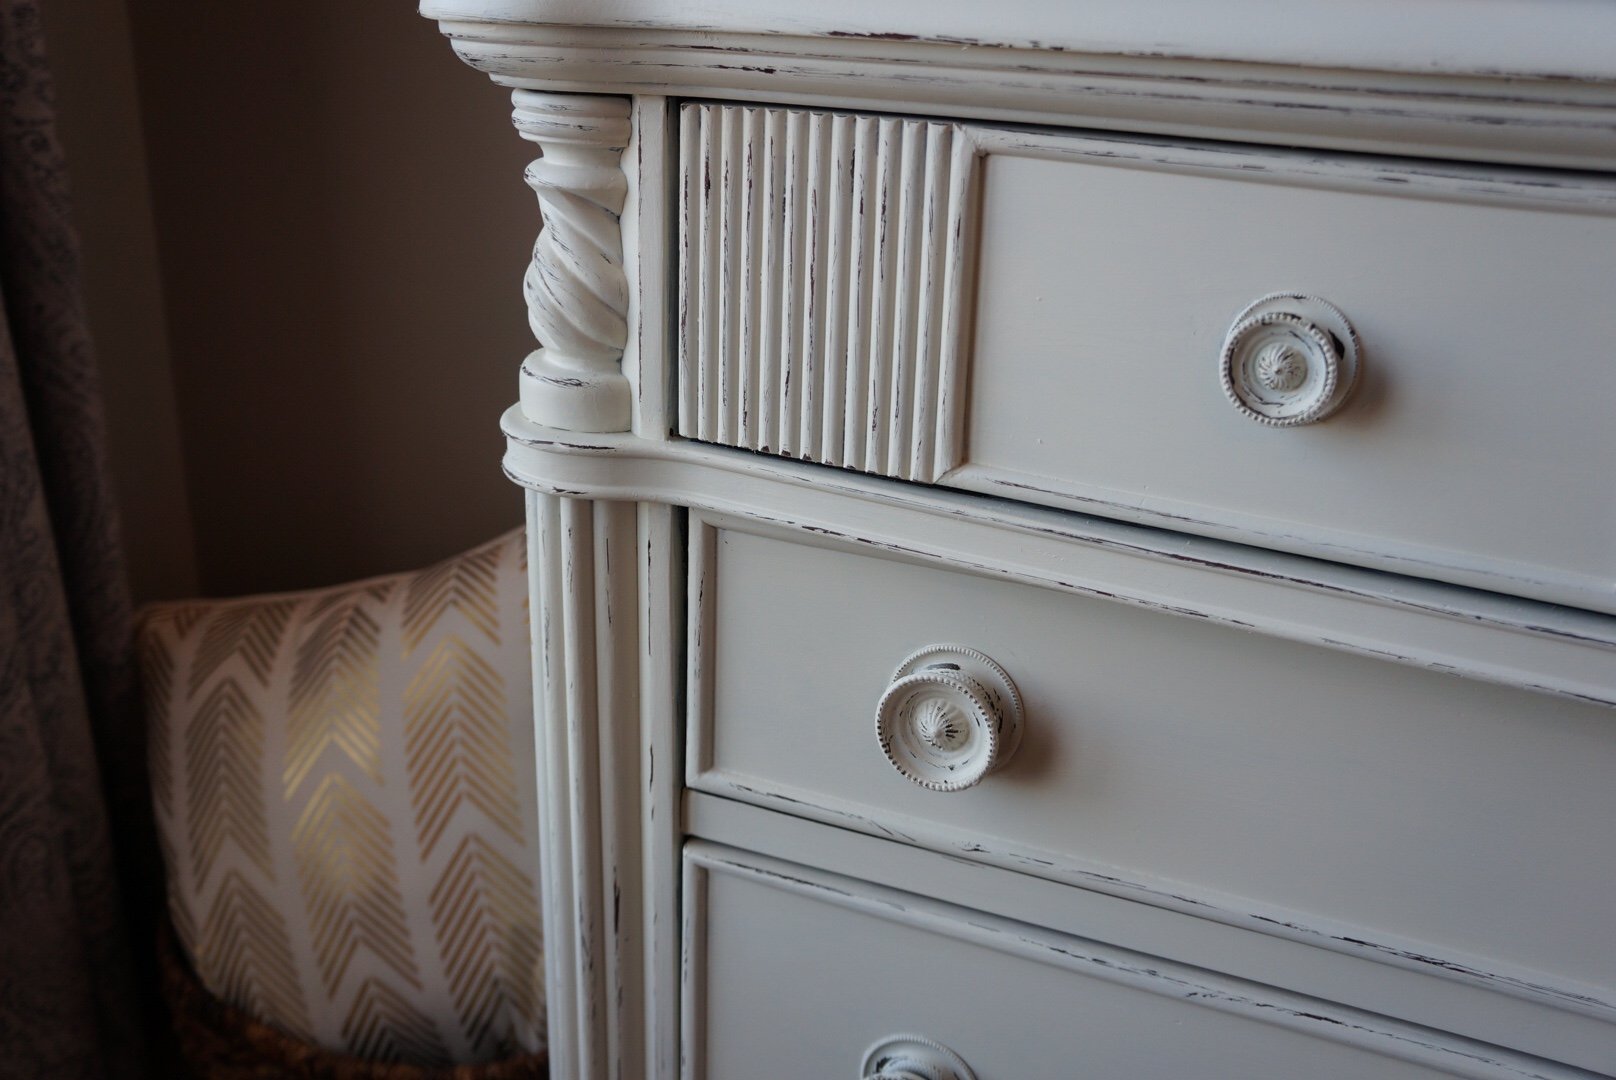
- The details are all in the distressing!
-
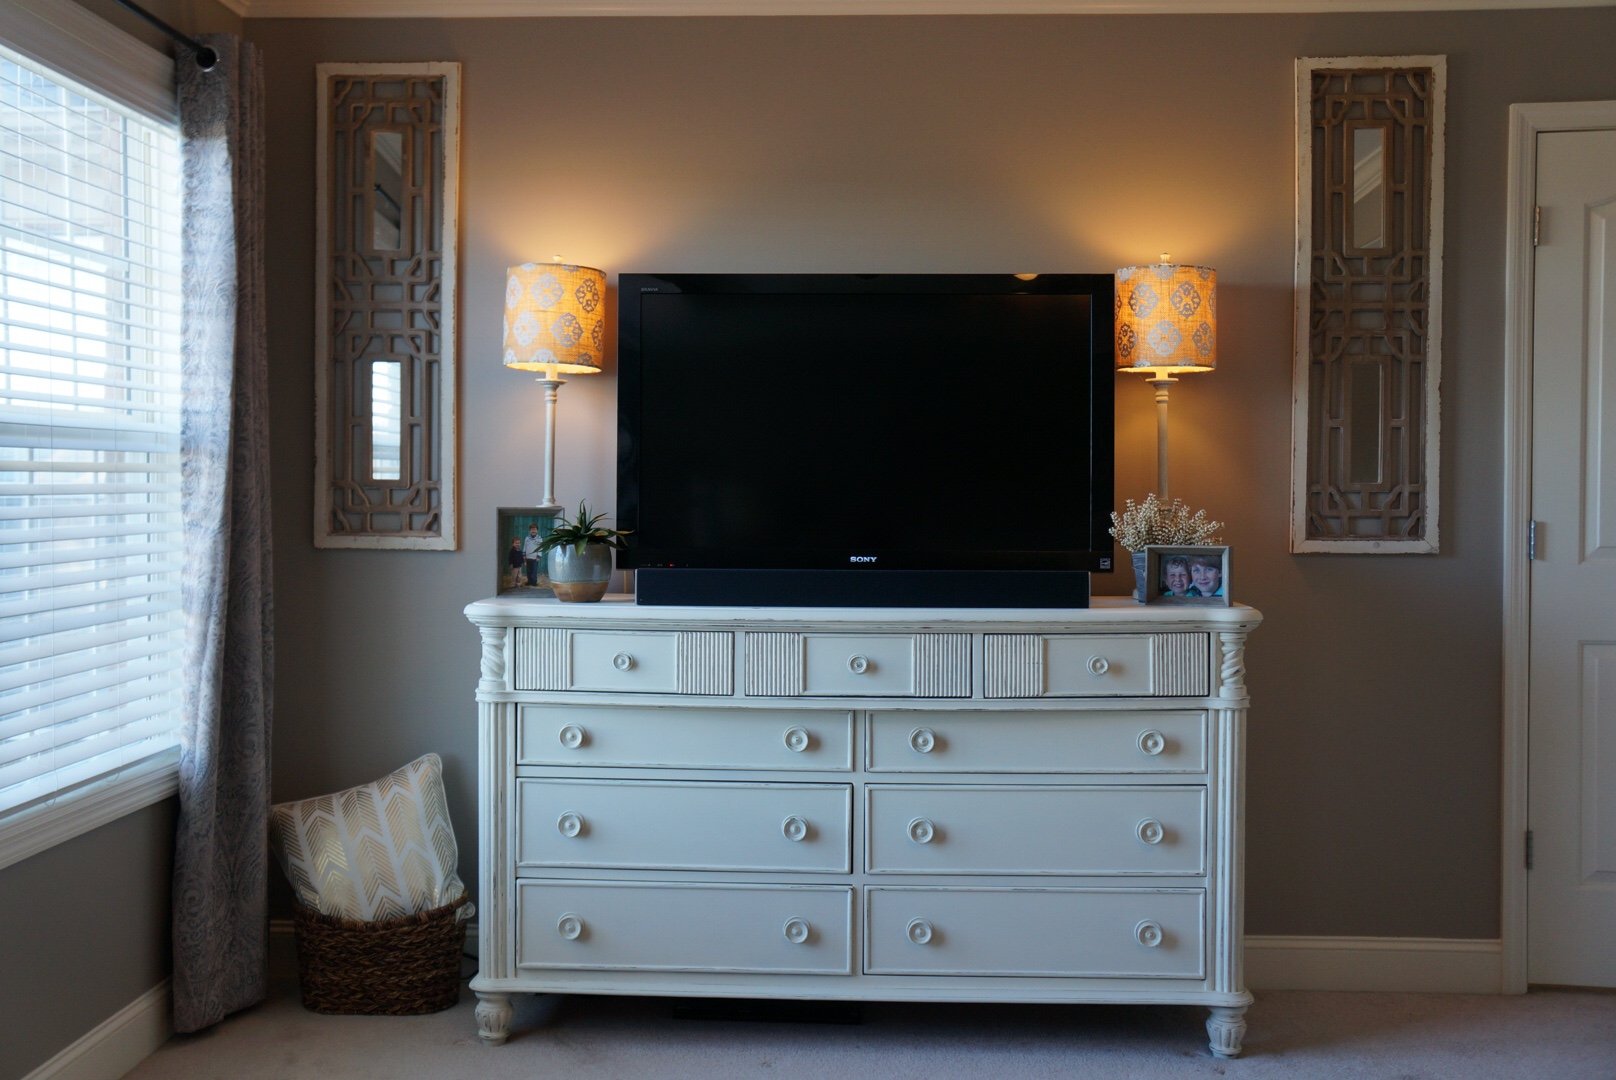
- All done and decorated!
If I would have gone out and bought a new dresser for our bedroom, it would have cost WAY more than that $100. Now I have a “new” piece that will last for years to come. Now, start walking around your house with a paint brush to see what you can get those little bristles on!
This also finally gave me the perfect spot to hang my new pieces from Kirklands, which I told y’all about here. I really love them! The lamps I actually moved up from my dining room for picture purposes, but I do plan on getting lamps for this piece eventually! I laid in bed last night and just stared at it, still amazed at the beauty of paint and how much it can transform a space on a BUDGET! If you don’t have the money to go out and replace furniture, consider painting it or having a professional paint it if painting just isn’t your thing. You will be amazed and possibly hooked 😉
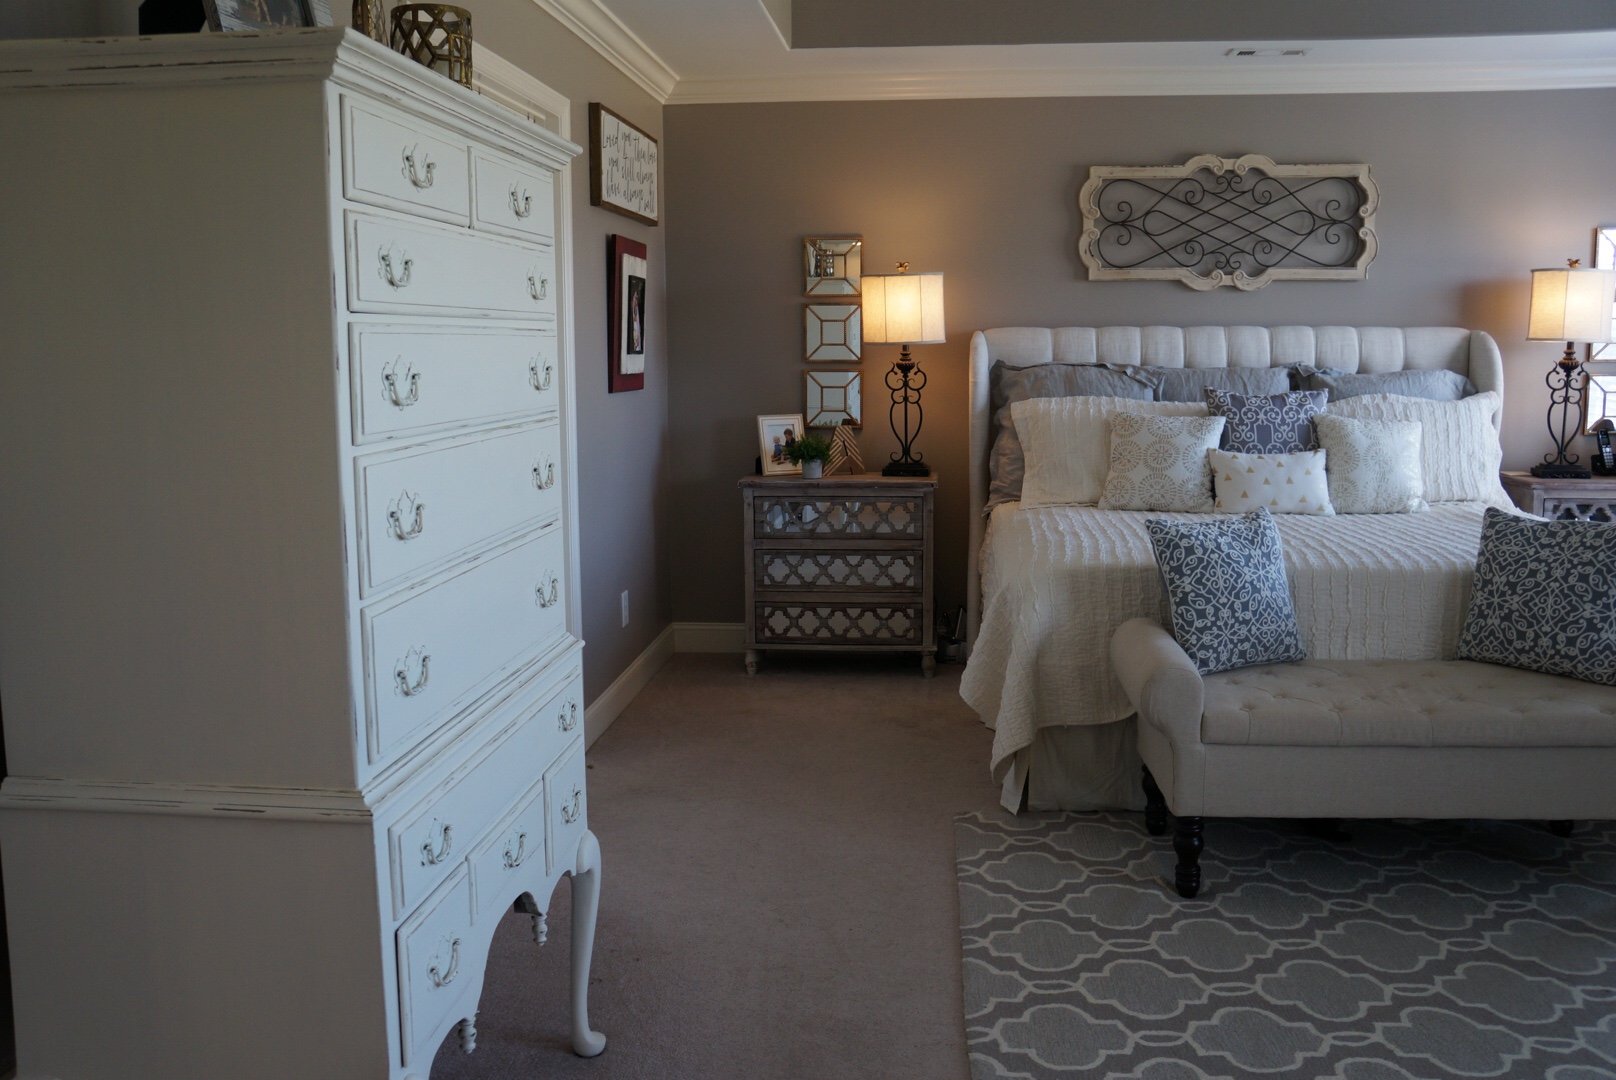
Here are a few shots of the FULL transformation. The before with old wall color, old furniture, bedding, etc (I still can’t believe the difference) and some after pics of our now FINISHED and updated master bedroom. So glad to check this home project off the list!


Next week I will be painting a beautiful custom bedroom set and I’m going to do a more detailed tutorial on how to paint a piece of furniture. So, start by getting your supplies above and stay tuned for the how to of furniture painting to get all of your questions answered. If there is something specific you have been wanting to know, please let me know in the comments so I can be sure to answer it for you in my next post! Until the next project…
~ Stacey
0 Comments