
If you’ve been around here a while, you know I love a good neutral piece of décor — especially one I can tweak for different seasons. That’s exactly why I’m obsessed with this wood bead wreath DIY! It’s simple, pretty, and works with just about any decorating style, from modern farmhouse to cottage chic.
This is one of those projects that’s not just easy — it’s also budget-friendly and totally customizable. You can keep it minimal, add seasonal flowers, or even swap out the bow for a quick refresh. Let’s get to it!
Why You’ll Love This DIY Wood Bead Wreath
- Neutral style that works year-round
- Easy to customize for holidays and seasons
- Quick project — you can finish it in under an hour
- Budget-friendly farmhouse look

Supplies You’ll Need
- 12″ wood wreath from Michael’s (That is where I got mine, but you could do something else that is similar as well)
- Wood half beads/sliced wood balls. I got mine from Amazon and the ones I am using here are the 1inch size.
- Hot glue gun
- Glue sticks
- Faux greenery or florals
- Ribbon or bow for hanging
- Wire cutters or scissors
- Burlap mesh flower
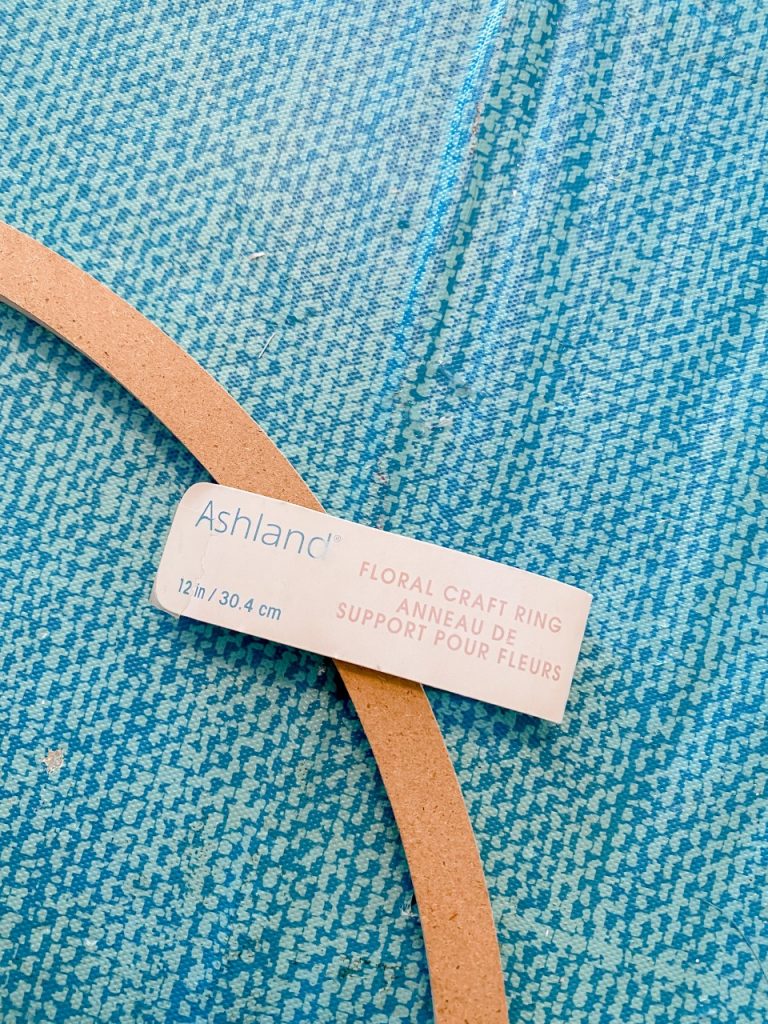
This is what the wood ring is called from michael’s
Step-by-Step Instructions for Making a Wood Bead Wreath
Finish with a Bow
Tie on a ribbon or bow that fits your style — burlap for farmhouse, velvet for a softer feel, or seasonal colors for the holidays.
Prepare the Wreath Form
Remove any packaging or extra wires so you have a clean base.
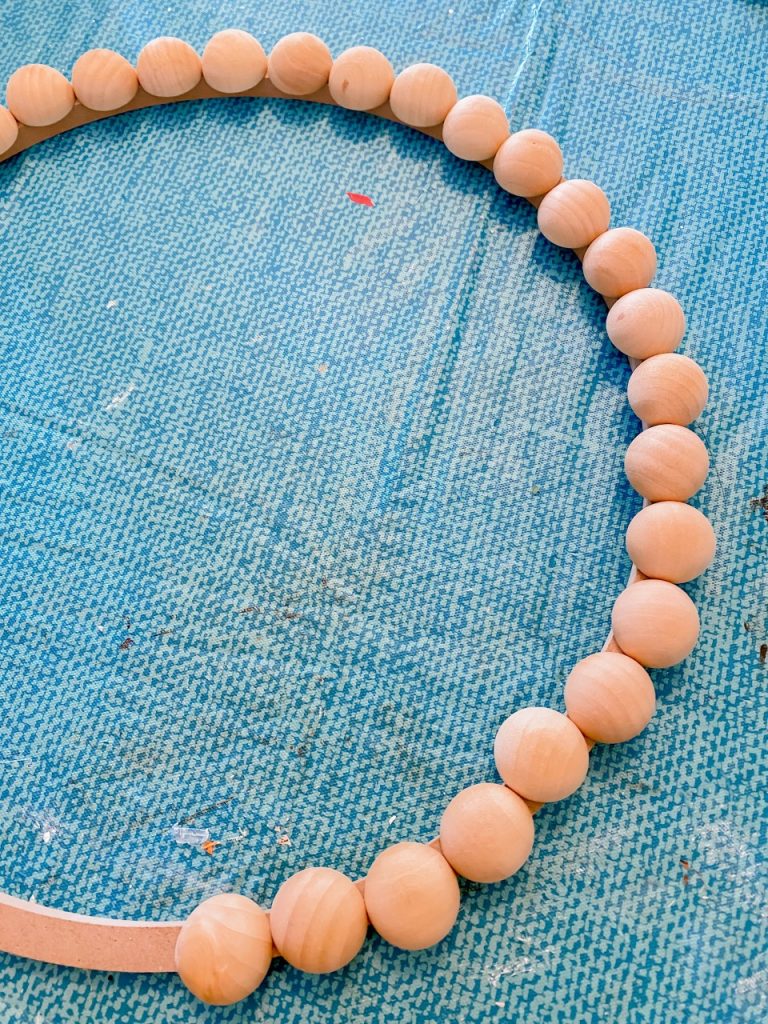
Add the Wood Beads
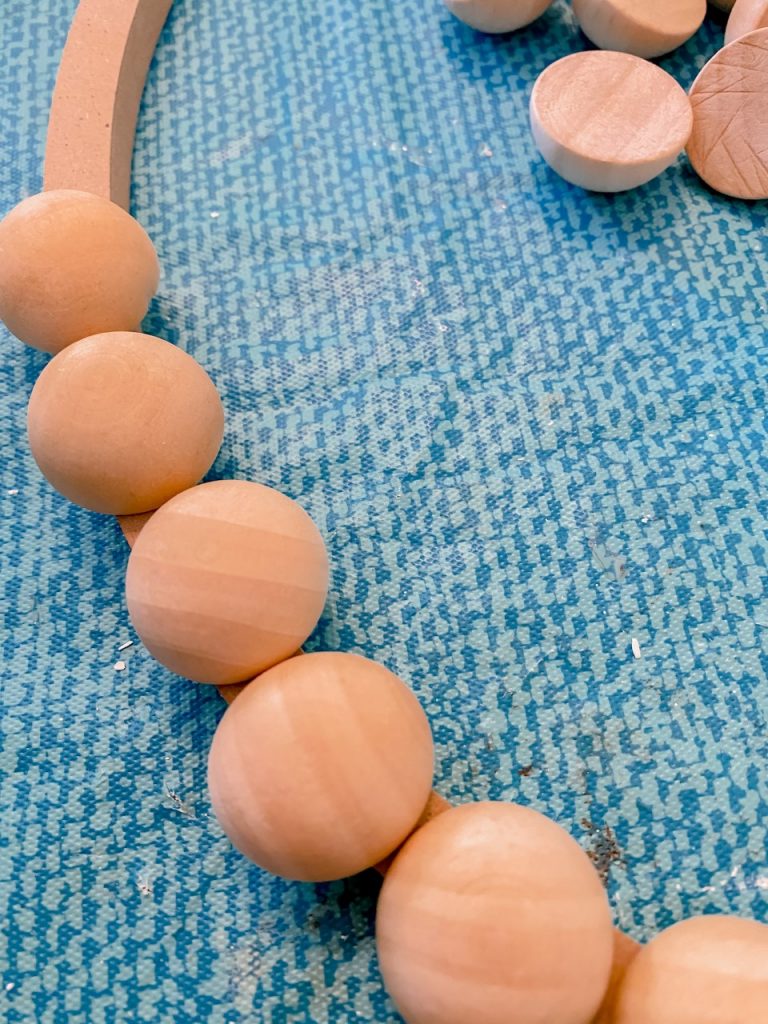
Slide each bead onto the wreath form until it’s completely covered. You may need to adjust the number of beads depending on the size of your form.
I ended up using 33 of the beads (you will use more than this if you use the smaller size beads)
Secure the Beads
Use a dab of hot glue between the first and last bead to keep them from sliding.
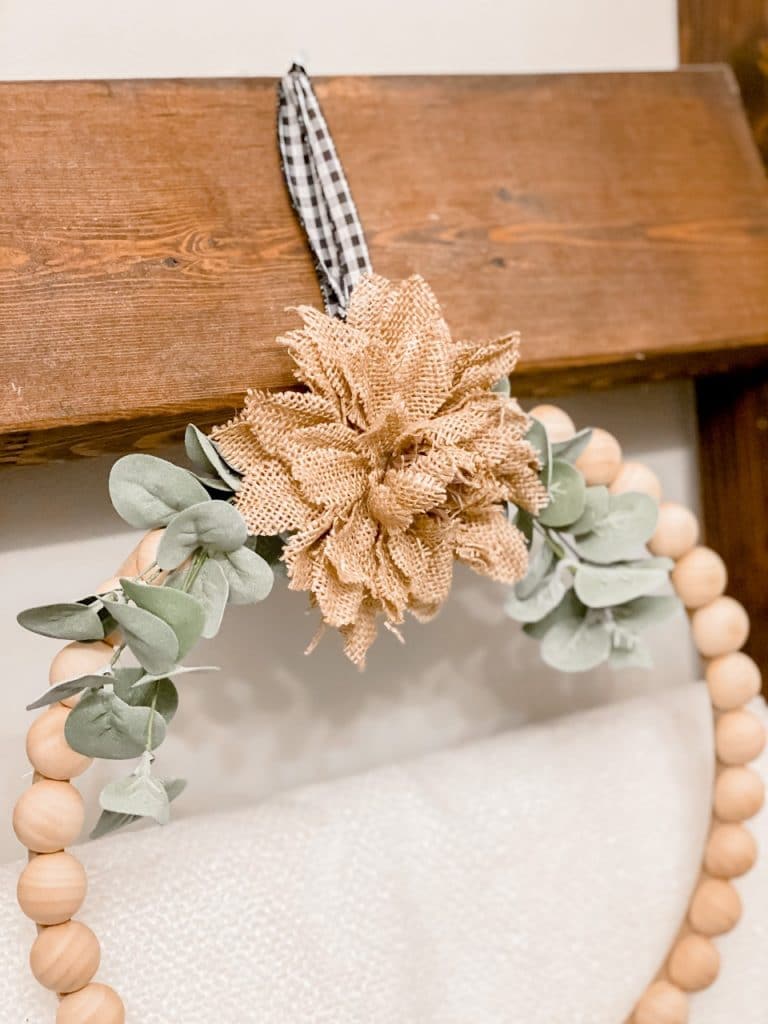
Add Focal Burlap Flower
Once I had those attached, I attached this big burlap flower from hobby lobby to the middle. A little bit of hot glue and some floral wire was all it took!
Add Greenery or Florals
Next, I added my greenery on either side. These little stems also came from Hobby lobby! I just trimmed off the ends to get them the size I wanted and then again wrapped them around the wreath form with floral wire to secure them.

How cute would it be to even change out the florals on this for different seasons?!
Add Ribbon Hanger
Last but not least, I just added a little buffalo check ribbon at the top to have something to hang it from!
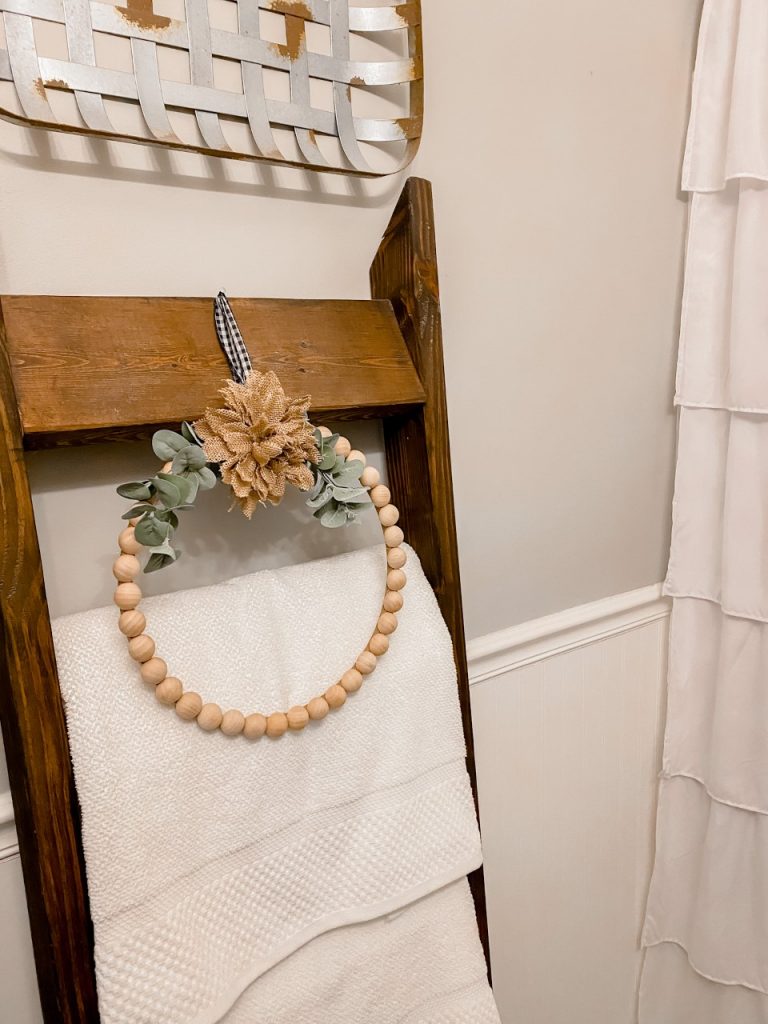
I ended up putting my wood bead wreath on a little ladder I have in our downstairs guest bath, and I truly think it looks adorable there. What do you think?!
Decorating & Styling Ideas
- Minimal Farmhouse: Just the beads and greenery for a clean, classic look
- Seasonal Switch-Up: Add mini pumpkins for fall, poinsettias for Christmas, or pastel flowers for spring
- Bold & Colorful: Paint your beads before assembling for a unique twist
Tips for Customizing Your Bead Wreath for Any Season
- Buy extra beads so you can create a few wreaths at once. They make great gifts!
- Try alternating bead sizes for more texture.
- Use removable floral wire for greenery so you can swap it out seasonally without starting from scratch.
Frequently Asked Questions About Wood Bead Wreaths
Q: Can I paint the wood beads?
A: Yes! Chalk paint, spray paint, or even stain works beautifully.
Q: How do I hang my wood bead wreath?
A: Use a wide ribbon, a command hook, or a wreath hanger depending on your display spot.
Q: Can I make this wreath for outdoor use?
A: Yes, but make sure your beads and greenery are weatherproof or sealed to prevent damage.
This wood bead wreath is the perfect project for when you want something simple yet stunning. It’s versatile enough to use all year and easy to personalize for any holiday or style.
If you make one, I’d love to see it! Tag me on Instagram or Pinterest so I can cheer you on.
I hope this inspired you to get creative and make a wood bead wreath for yourself!
Until next time…
Stacey

Stacey…. How cute and easy this wreath looks!!! So beautiful!!!!???
Your wreath is so cute. I think I can make that!!!
I bought the stuff to make this tonight I can’t wait. Where do I send a picture so you can see it I’m not sure what to do with that yet.
You can message it to me on fb or post it on my page!
Love it. Did you make or buy your burlap flower? It is so cute & perfect for the wreath
bought it from hobby lobby
Love the wreath. I watched you make it. Love watching you craft.
Super cute – super easy! Thank you for sharing.
This is super cute! Thank you for the inspiration.
Love the wreath Stacy. Cant wait to make one
Oh my gosh! I love this wreath!
That is so adorable! Different from ones sold in stores. Definitely making this!!!
Do you have a link for the beads?